
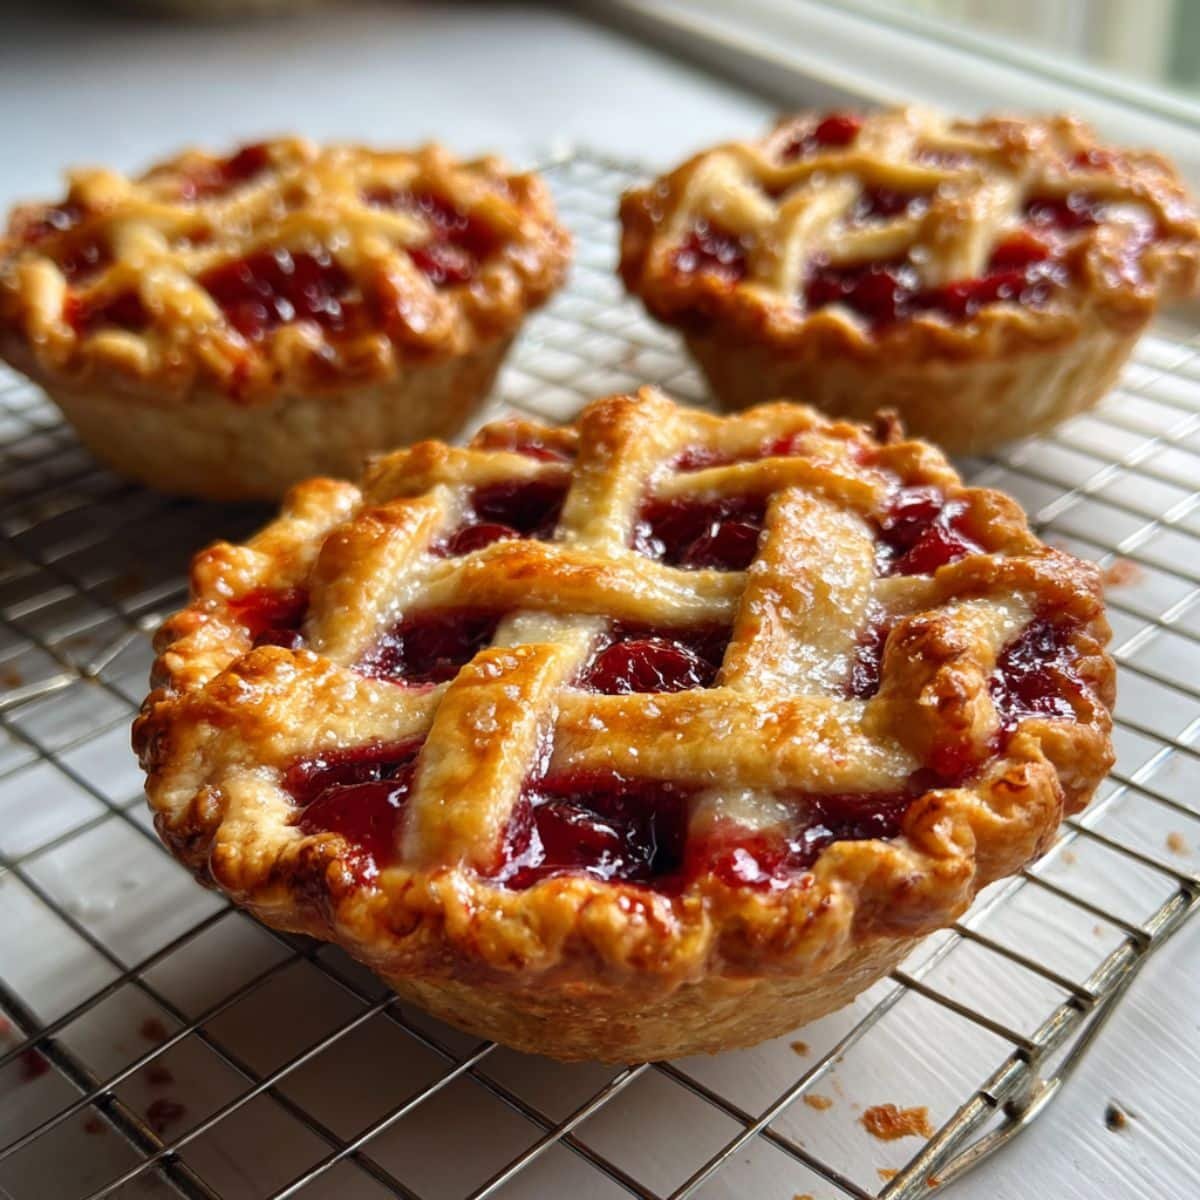
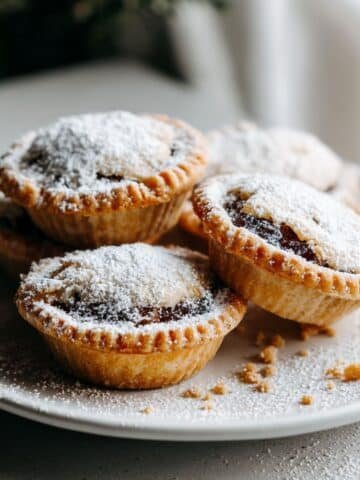
There's something magical about biting into a perfectly crafted mini cherry pie; the flaky crust giving way to sweet, tangy cherry filling that bursts with flavor. I've been making mini cherry pies for years, and they've become my go-to dessert for gatherings because everyone loves having their own individual portion. These bite size cherry pies are not only adorable but incredibly practical; you can make them ahead, customize them easily, and watch them disappear within minutes at any party. Whether you're a baking novice or a seasoned pro, mini cherry pies are forgiving, fun to make, and guaranteed to impress your guests with minimal effort.
The beauty of mini cherry pies lies in their versatility and convenience; you can use store-bought crust for speed or make everything from scratch for that homemade touch. I've perfected this recipe through countless batches, tweaking the filling ratio, testing different crust techniques, and discovering the secrets that make these mini cherry pies turn out perfectly every single time. Trust me, once you master this recipe, you'll be making these delightful mini cherry desserts for every occasion from holiday gatherings to casual weekend treats.
Why These Mini Cherry Pies Are Simply Irresistible
What makes these mini cherry pies stand out from other cherry desserts is the perfect balance of portability, flavor, and presentation. Unlike traditional full-sized pies that require plates and forks, these individual cherry pies can be eaten with your hands, making them ideal for parties, picnics, and potlucks. The mini format also means you get a better crust-to-filling ratio, ensuring every bite delivers that perfect combination of buttery pastry and sweet cherry goodness that mini cherry pie lovers crave.
I've tested this recipe against countless other mini cherry pie recipes, and what sets this version apart is the careful attention to preventing soggy bottoms, achieving the ideal filling consistency, and creating that beautiful golden crust. The secret lies in pre-baking the crust slightly, using the right amount of thickener in your cherry pie filling dessert, and knowing exactly when to pull them from the oven. These homemade mini cherry pies deliver bakery-quality results in your own kitchen, and the technique I'll share ensures even beginner bakers can achieve professional-looking mini cherry tarts that taste absolutely divine.
Jump to:
Ingredients
- Fresh or canned cherry pie filling
- All-purpose flour
- Unsalted butter
- Granulated sugar
- Salt
- Ice water
- Cornstarch
- Vanilla extract
- Lemon juice
- Egg
- Cinnamon
- Almond extract

See recipe card for quantities.
Instructions
Prepare Your Dough and Filling
- Mix flour, salt, and cold butter until crumbly
- Add ice water gradually until dough forms
- Chill dough for 30 minutes in refrigerator
- Prepare cherry filling by combining cherries, sugar, cornstarch, and flavorings
- Let filling sit while dough chills to allow flavors to develop
Assemble Your Mini Pies
- Roll out dough to ⅛ inch thickness on floured surface
- Cut circles to fit your muffin tin or tart pans
- Press dough into each cavity gently
- Fill each crust three-quarters full with cherry mixture
- Add top crust or lattice design if desired
Bake to Perfection
- Brush tops with egg wash for golden color
- Cut small vents in top crusts for steam release
- Bake at 375°F until crust is golden brown
- Cool in pan for 10 minutes before transferring
- Allow to cool completely for best texture and easier removal
Equipment For Mini Cherry Pies
- Muffin tin or mini tart pans
- Rolling pin
- Pastry cutter or fork
- Mixing bowls
- Pastry brush
- Cookie cutters or round cutters
- Cooling rack
- Measuring cups and spoons
- Parchment paper
Expert Cooking Tips
- Keep all ingredients cold for flakiest crust in your mini cherry pies
- Don't overfill; filling expands during baking
- Brush egg wash only on crust, not filling
- Use cornstarch for thicker filling that won't run
- Let pies cool completely before removing from pan
- Freeze unbaked pies for quick future desserts
- Score vents in decorative patterns for visual appeal
- Sprinkle coarse sugar on top before baking for extra crunch
Recipe Variations
- Graham Cracker Crust: Use crushed graham crackers mixed with melted butter for no-roll mini cherry pies base
- Puff Pastry Version: Swap traditional crust for store-bought puff pastry for ultra-flaky mini cherry hand pies
- Crumb Top: Replace top crust with streusel topping for mini cherry crumb pies variation
- Mixed Berry: Combine cherries with blueberries for blueberry cherry mini crumb pies
- Chocolate Cherry: Add mini chocolate chips to filling for decadent twist
- Almond Glaze: Drizzle with almond-flavored icing after cooling
- Jar Version: Assemble in small mason jars for mini cherry pies in jars presentation
- Spiced Cherry: Add cinnamon and nutmeg for warm, spiced flavor profile
Storage
- Room Temperature: Store in airtight container for up to 2 days
- Refrigerator: Keep mini cherry pies covered for up to 5 days
- Freezing Baked: Wrap individually and freeze for up to 3 months
- Freezing Unbaked: Freeze assembled unbaked pies for up to 2 months
- Reheating: Warm in 350°F oven for 10-15 minutes before serving
- Thawing: Let frozen pies thaw in refrigerator overnight
The Secret to Bakery-Quality Results
The real magic behind exceptional mini cherry pies lies in understanding moisture control and temperature management; two factors that separate good pies from extraordinary ones. I learned through years of experimentation that brushing the bottom crust with a thin layer of beaten egg white before adding filling creates an invisible barrier that prevents sogginess, while chilling your assembled pies for 15 minutes before baking helps the crust hold its shape beautifully. This double technique ensures your mini cherry pie bites maintain their structure and deliver that satisfying crunch with every bite.
Another game-changing secret is the cooling process; resist the temptation to dig in immediately after baking your easy mini cherry pies. The filling needs time to set properly, and pulling them out too early results in runny centers. I always cool mine completely in the pan first, then refrigerate for at least an hour before serving. This patience pays off with clean slices and filling that stays perfectly contained. Additionally, macerating your cherries with sugar for 30 minutes before assembling draws out excess moisture, which you can then drain off, resulting in a filling that's intensely flavored without being watery.
FAQ
What temperature do you cook mini cherry pies?
The ideal temperature for baking mini cherry pies is 375°F, which allows the crust to turn golden brown while thoroughly cooking the filling. I recommend preheating your oven fully and positioning your rack in the lower third for even browning. Start checking your mini cherry pies at 20 minutes, though most need 25-30 minutes total. They're done when golden and bubbling.
How long to bake mini cherry tarts?
Mini cherry tarts typically require 25-30 minutes in a preheated 375°F oven, though time varies based on pan depth and crust thickness. For mini cherry pies in muffin tin, watch for golden-brown edges and bubbling filling. Shallow tart pans need 20-25 minutes. Monitor closely to prevent over-browning; tent with foil if needed while centers finish baking perfectly.
What are common cherry pie baking mistakes?
The most frequent mistake when making mini cherry pies is overfilling, causing messy overflow and soggy bottoms. Using filling that's too thin is another error; always use adequate cornstarch for proper consistency. Many bakers skip the egg wash, missing that golden sheen, or remove pies too quickly while hot, causing them to break. Patience ensures perfect mini cherry pies.
Do cherry pies need to be refrigerated after baking?
While mini cherry pies can sit at room temperature for two days in an airtight container, refrigeration extends freshness to five days and is recommended for fresh fruit fillings. Homemade mini cherry pies with store-bought filling handle room temperature better. For best texture and food safety, refrigerate after cooling completely, especially during warm weather or with dairy components.
Your Next Baking Adventure Awaits
Now that you've mastered the art of creating perfect mini cherry pies, why not expand your repertoire with similar delightful treats? If you loved these bite-sized wonders, you'll absolutely adore our Cheesecake Cupcakes recipe, which delivers the same individual-portion convenience with creamy, dreamy cheesecake flavor that rivals any bakery. These cupcakes share the same party-friendly format as mini cherry pies, making them ideal for your next gathering when you want to offer variety.
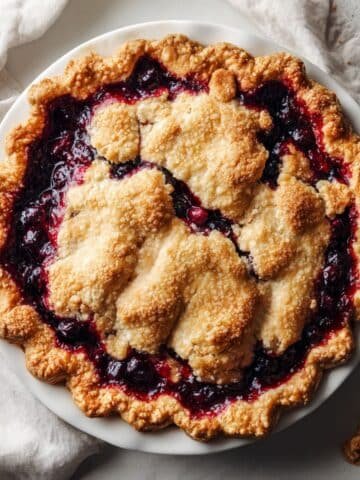
For another seasonal favorite that complements these cherry beauties, try our Best Cranberry Pie Recipe, which brings together tart cranberries in a stunning full-sized pie that's perfect for holiday celebrations. Both recipes use similar techniques you've learned here, so you'll feel confident tackling them. The skills you've developed making mini cherry pies—working with pastry, balancing sweet and tart flavors, and achieving that perfect golden crust—transfer beautifully to these other desserts, making you a more versatile and confident baker with every recipe you try.
From my kitchen, with heart.
Nicole Harper ❤️
Related
Looking for other recipes like this? Try these:
Pairing
These are my favorite dishes to serve with Mini Cherry Pies

Mini Cherry Pies
Equipment
- 1 Muffin tin or mini tart pans For shaping mini pies
- 1 Rolling pin To roll out crust evenly
- 1 Pastry cutter or fork For cutting butter into flour
- 2 Mixing bowls One for dough, one for filling
- 1 Pastry brush For applying egg wash
- 1 Cooling rack To cool pies completely
- – Measuring cups and spoons
- – Parchment paper For easy cleanup
Ingredients
Pie Crust
- 2 cups all-purpose flour for pie crust
- ½ teaspoon salt enhances flavor
- ¾ cup unsalted butter cold, cubed
- 4–6 tablespoon ice water for dough
Filling
- 2 cups cherry pie filling fresh or canned
- 2 tablespoon granulated sugar adjust to taste
- 1 tablespoon cornstarch thickener
- 1 teaspoon vanilla extract for flavor
- 1 teaspoon lemon juice balances sweetness
- 1 large egg for egg wash
- ¼ teaspoon cinnamon optional
- ¼ teaspoon almond extract optional, enhances cherry flavor
Instructions
- Mix flour, salt, and butter until crumbly. Add ice water until dough forms. Chill 30 minutes.
- Combine cherries, sugar, cornstarch, and flavorings. Let sit.
- Roll out dough, cut circles, and line muffin tin.
- Fill each crust with cherry mixture and add lattice tops.
- Brush with egg wash, cut vents, and bake at 375°F for 25–30 mins.
- Cool 10 mins in pan, then transfer to rack.
- Serve or store once fully cooled.
Leave a Reply