
Craving something rich, warm, and chocolatey—right now? This Molten Lava Mug Cake is your instant ticket to dessert heaven. As a trained home baker and dessert lover, I’ve tested countless quick recipes, and nothing comes close to the satisfaction of this Molten Lava Mug Cake. Ready in just 5 minutes, it delivers everything you’d expect from a restaurant-style molten cake: a tender, fluffy exterior and an irresistibly gooey chocolate center that oozes like molten lava with every bite.
Whether you're treating yourself after a long day or impressing someone with minimal effort, this Molten Lava Mug Cake is the ultimate fast indulgence. No oven, no hassle—just pure chocolate bliss in a mug. Trust me, once you try this Molten Lava Mug Cake, you'll want to keep it on repeat.

Why This Molten Mug Cake Stands Out
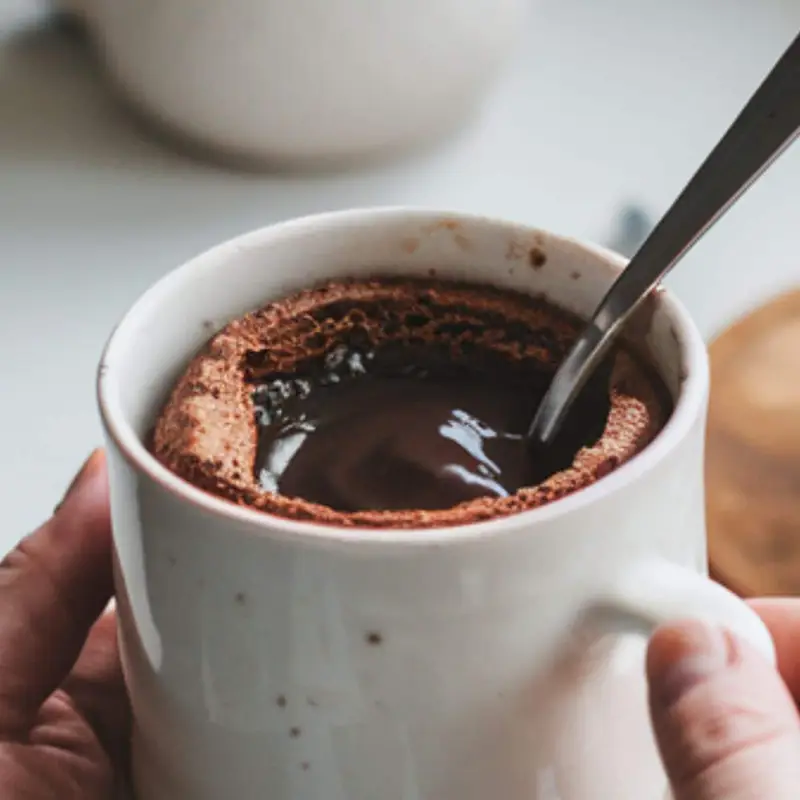
There’s something undeniably magical about slicing into a cake and watching warm, molten chocolate flow from the center. It’s a sensory experience that used to require careful oven timing and specialty ramekins—but not anymore. This Molten Lava Mug Cake brings that same rich, gooey indulgence straight to your microwave, no fuss required.
What makes this Molten Lava Mug Cake so special is its simplicity. Using only basic pantry staples, a single mug, and about five minutes of your time, you can enjoy a luxurious, restaurant-style dessert right at home. It’s perfect for those times when you crave something sweet but don’t want the hassle of baking an entire cake.
This foolproof Molten Lava Mug Cake is ideal for:
- A quick, satisfying after-dinner treat
- A late-night chocolate fix
- An easy yet impressive dessert for surprise guests
- A fun and safe cooking activity to enjoy with kids
Once you try this Molten Lava Mug Cake, it’s bound to become your go-to for instant chocolate comfort.
Jump to:
Ingredients
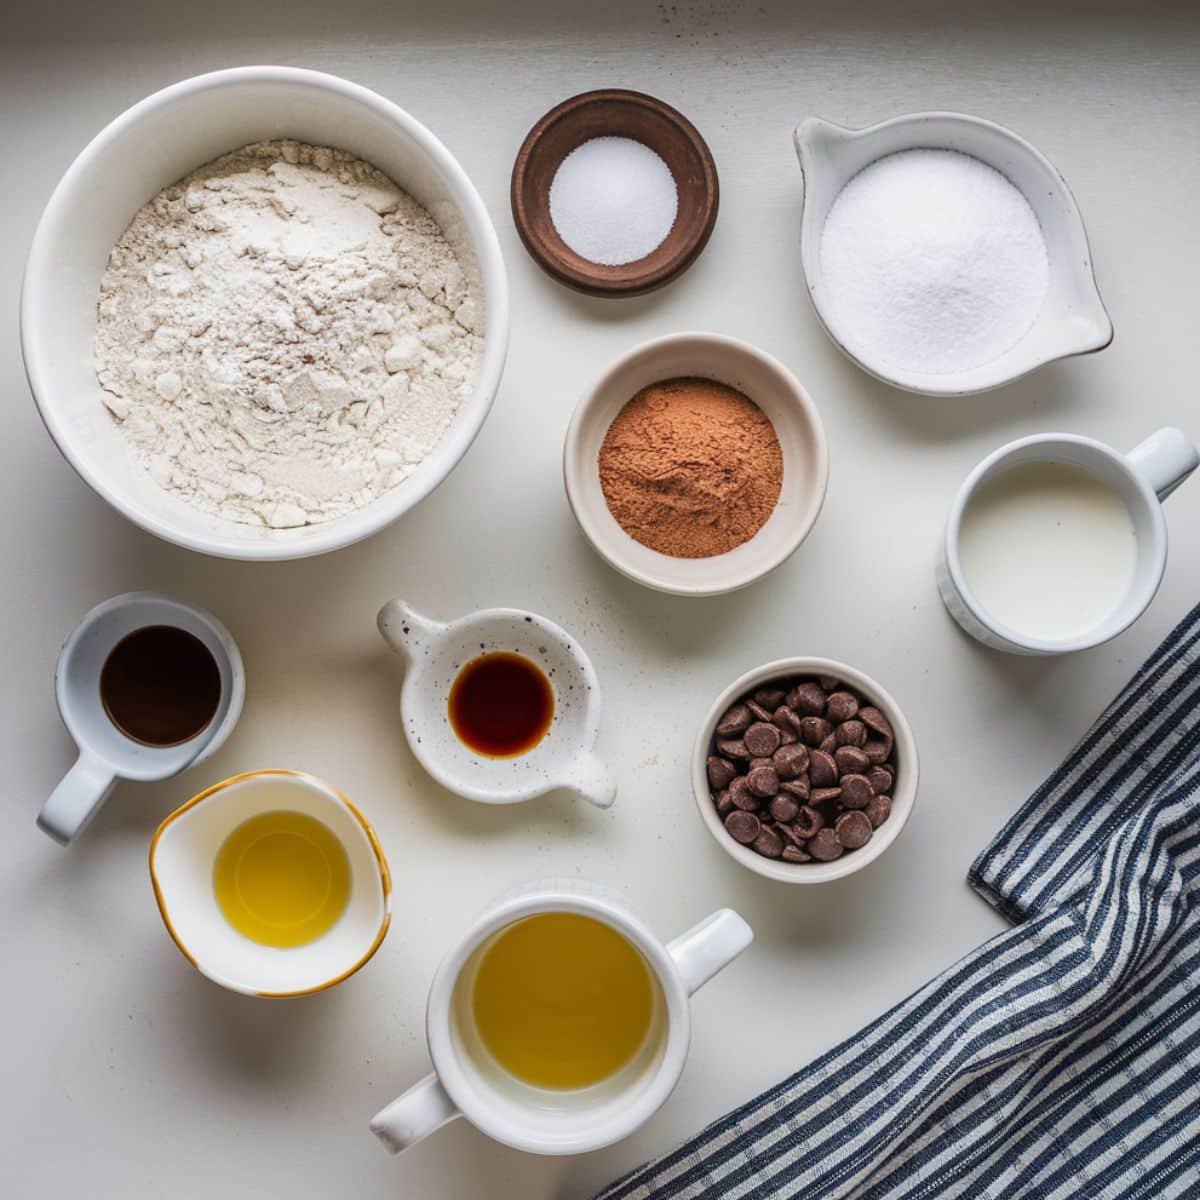
For one perfect chocolate molten lava cake in a mug, gather:
- All-purpose flour
- Unsweetened cocoa powder
- Baking powder
- Salt
- Granulated sugar
- Milk (any kind works)
- Vegetable oil or melted butter
- Vanilla extract
- Chocolate chips or a small piece of chocolate bar (for the molten center)
- Espresso powder (optional)
See recipe card for quantities.
Instructions
Mix & Prep
Choose a large microwave-safe mug and lightly grease it. Mix all dry ingredients (flour, cocoa, baking powder, salt, sugar) directly in the mug until well combined. Add wet ingredients (milk, oil, vanilla) and stir until you have a smooth batter. Push chocolate pieces into the center of the batter - this creates your molten center.
Microwave
Place your mug in the microwave and cook on high for 45-70 seconds, depending on your microwave power. The cake is done when the top looks set but still slightly moist. Remember: it's better to undercook than overcook for the perfect molten center!
Rest & Enjoy
Let your mug cake rest for 1 minute after microwaving. This allows the cake to settle and the center to reach the perfect flowing consistency. Top with ice cream, whipped cream, or powdered sugar if desired, and serve immediately while still warm to enjoy that perfect molten center.

- Mix & Prep: Mix dry and wet ingredients until smooth.

- Microwave: Microwave the cake until the top looks set.
- Rest & Enjoy: Let rest for 1 min, then enjoy the gooey cake.
Equipment For Molten Lava Mug Cake
The beauty of this molten lava mug cake recipe is its simplicity! You only need:
- A microwave-safe mug (ceramic works best)
- A fork or small whisk for mixing
- Measuring spoons
If you make mug cakes frequently, consider getting a set of microwave-safe mugs with straight sides rather than sloped ones. They cook more evenly and make it easier to achieve that perfect texture throughout.
Expert Cooking Tips
- Perfect timing: The exact cooking time varies between microwaves. Start with 45 seconds, then add 5-10 second increments if needed. The top should look set but slightly moist.
- Testing doneness: The cake should spring back slightly when touched but still feel soft in the center.
- Chocolate selection: For an extra-rich molten center, use high-quality chocolate with at least 60% cocoa content.
- Mug size matters: Using a mug that's too small may cause overflow, while one that's too large might result in overcooking.
- Even better flavor: For a deeper chocolate flavor, let the batter rest for 5 minutes before microwaving.
Recipe Variations
Vegan Molten Lava Cake
Turn this into a vegan molten lava cake by using plant-based milk, vegetable oil instead of butter, and dairy-free chocolate chips. The result is just as gooey and delicious!
Gluten-Free Version
Substitute the all-purpose flour with a gluten-free flour blend (preferably one that contains xanthan gum). The texture might be slightly different, but you'll still get that amazing molten center.
Flavor Twists
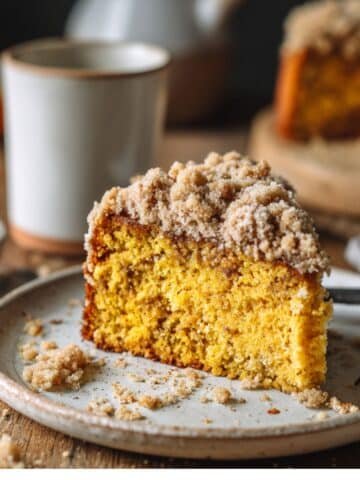
- Pumpkin molten lava cake: Add 1 tablespoon of pumpkin puree and a dash of pumpkin spice to the batter.
- Mint chocolate: Use mint-flavored chocolate for the center or add ¼ teaspoon of mint extract to the batter.
- Peanut butter surprise: Push a small spoonful of peanut butter into the center instead of (or alongside) the chocolate.
- Spicy kick: Add a tiny pinch of cayenne or chili powder for a Mexican-inspired molten lava cake with a subtle heat.
Storage
This molten chocolate mug cake is best enjoyed immediately after cooking while the center is still warm and flowing. However, if you want to prep ahead:
Make-Ahead Batter
You can mix the dry ingredients ahead of time and store them in an airtight container. When ready to enjoy, just add the wet ingredients and chocolate center before microwaving.
Fridge Storage
While not ideal (as the molten center will solidify), leftover mug cake can be refrigerated for up to 2 days. Reheat in the microwave for 15-20 seconds to warm through before eating.
My Grandmother’s Secret Touch
Growing up, my grandmother always believed that the tiniest details made the biggest difference—and her desserts were living proof. One of her best-kept secrets, which I still use today in this Molten Lava Mug Cake, is adding a surprise in the center: a mix of chocolate chips and a piece of soft-filled chocolate, like a truffle or caramel-filled square. This little touch creates an extra-rich, velvety core that melts beautifully, making each bite feel like a warm hug. It’s a simple trick, but it transforms your Molten Lava Mug Cake from “quick treat” to “unforgettable indulgence.” Trust me—this is the kind of secret you’ll want to pass down, too.
FAQ
How to make a molten chocolate mug cake?
To make a molten chocolate mug cake, mix 4 tablespoons flour, 2 tablespoons cocoa powder, 3 tablespoons sugar, and ¼ teaspoon baking powder in a mug. Add 3 tablespoons milk, 2 tablespoons oil, and ¼ teaspoon vanilla. Stir until smooth, then push chocolate chips into the center. Microwave for 45-60 seconds until edges are set but center remains gooey. Let rest one minute before enjoying.
What is the difference between molten cake and lava cake?
There's no real difference between molten cake and lava cake—they're the same dessert with different names. Both feature a chocolate cake exterior with a warm, flowing chocolate center that "erupts" when cut into, resembling lava. The dessert was created by chef Jean-Georges Vongerichten in the 1990s and has become popular in both restaurant and home versions.
How to make a mug cake with 3 ingredients?
Make a simple 3-ingredient molten lava mug cake by combining ¼ cup chocolate hazelnut spread (like Nutella), 2 tablespoons self-rising flour, and 1 egg in a microwave-safe mug. Mix until smooth, then microwave for 45-60 seconds until the edges are set but the center remains soft. The chocolate spread provides both flavor and the gooey center. Let cool slightly before enjoying.
Why is my mug cake so rubbery?
Your mug cake turns rubbery when it's overcooked or overmixed. Microwaving too long causes proteins to tighten and moisture to evaporate, creating that rubbery texture. Start with less cooking time (45 seconds) and check before adding more time. Also, mix ingredients just until combined—overmixing develops gluten, making the cake tough. Using too much flour can also cause rubbery results.
Ready to Melt Into Chocolate Bliss?
This Molten Lava Mug Cake recipe is living proof that dessert magic doesn’t require an oven, a mixer, or hours of prep—just a mug, a microwave, and a few pantry staples. In just 5 minutes, you’ll go from craving to indulging in a rich, gooey, restaurant-quality dessert that hits all the right notes.
Whether you’re whipping up a last-minute treat for yourself or surprising guests with something warm and decadent, this Molten Lava Mug Cake delivers unforgettable flavor with minimal effort. The moment your spoon sinks into that soft chocolate center and the lava begins to flow—that’s the kind of joy only dessert can bring.
If you loved this recipe, be sure to check out a few other favorites: our ultra-moist Chocolate Cupcakes Recipe for crowd-pleasing bakes, or the dreamy Easy Biscoff Tiramisu Recipe for no-bake layers of creamy indulgence.
Tried this Molten Lava Mug Cake? I’d love to hear how it turned out! Did you add your own twist—maybe a secret center or a topping you swear by? Drop your tips, experiences, and photos in the comments. Let’s inspire each other, one gooey spoonful at a time.
Related
Looking for other recipes like this? Try these:
Pairing
These are my favorite dishes to serve with Molten Lava Mug Cake Recipe

Molten Lava Mug Cake Recipe
Equipment
- 1 Microwave-safe mug At least 10 oz capacity
- 1 Fork or small whisk For mixing batter
- 1 Measuring spoons To ensure accuracy
Ingredients
- 4 tablespoon All-purpose flour
- 2 tablespoon Unsweetened cocoa powder Dutch-processed or regular
- ¼ teaspoon Baking powder
- 1 pinch Salt
- 3 tablespoon Granulated sugar
- 3 tablespoon Milk Any kind: dairy or plant-based
- 2 tablespoon Vegetable oil Or melted butter
- ¼ teaspoon Vanilla extract
- 2 tablespoon Chocolate chips Or small piece of chocolate bar for molten center
- 1 teaspoon Espresso powder Optional – enhances chocolate flavor
Instructions
- Prepare Mug
- Mix Dry Ingredients
- Add Wet Ingredients
- Add Chocolate Center
- Microwave
- Let Rest
- Serve and Enjoy


Joyce says
Sure would be nice if the author would include the time needed to cook the thing. I'm guessing around 1:30 or so, but to just say "microwave it" is to presume that everyone knows just what to do....and very few inexperienced cooks would have a clue how long to micro a mug brownie.
Bakingwhiz says
Hi Joyce! I really appreciate your note, the microwave time and all the specific info are listed in the recipe card at the bottom of the post. I hope your mug cake turned out rich and gooey! 😊🍫