
There's something timeless about the crisp, sweet bite of Vanilla Wafer Cookies. They instantly transport you back to childhood with their golden color and delicate crunch. But here's the secret: homemade Vanilla Wafer Cookies taste even better than the ones from the box.
Crafted with real ingredients and a touch of care, these cookies are the ultimate upgrade. They're perfect for layering into banana pudding, crushing into a cookie crust, or enjoying as a nostalgic snack with your afternoon coffee.
What makes these Vanilla Wafer Cookies special? It's the balance of vanilla warmth, crisp texture, and a buttery richness you just can't get from store-bought versions. And best of all—they're surprisingly easy to make from scratch.
Whether you're baking for a crowd, a dessert recipe, or simply indulging in a personal favorite, these Vanilla Wafer Cookies deliver consistent, delicious results every time.

Why These Homemade Nilla Wafers Stand Out
There’s something truly magical about baking your own Vanilla Wafer Cookies from scratch. Forget the boxed versions that sit on shelves for months—homemade Vanilla Wafer Cookies burst with rich vanilla flavor and a satisfyingly fresh texture.
When you make Vanilla Wafer Cookies at home, you’re in full control. No artificial flavors. No preservatives. Just real, quality ingredients and that comforting aroma of vanilla filling your kitchen.
These cookies strike the perfect balance—crisp on the edges, slightly tender in the center when warm, then beautifully crunchy all over as they cool. That signature snap makes them ideal for banana pudding, mini cheesecake crusts, or just enjoying straight off the tray.
And the best part? This recipe is thoroughly tested and foolproof. With just a few simple pantry staples, your homemade Vanilla Wafer Cookies will turn out perfect every single time. Once you taste them, there’s no going back to store-bought.
Jump to:
Ingredients
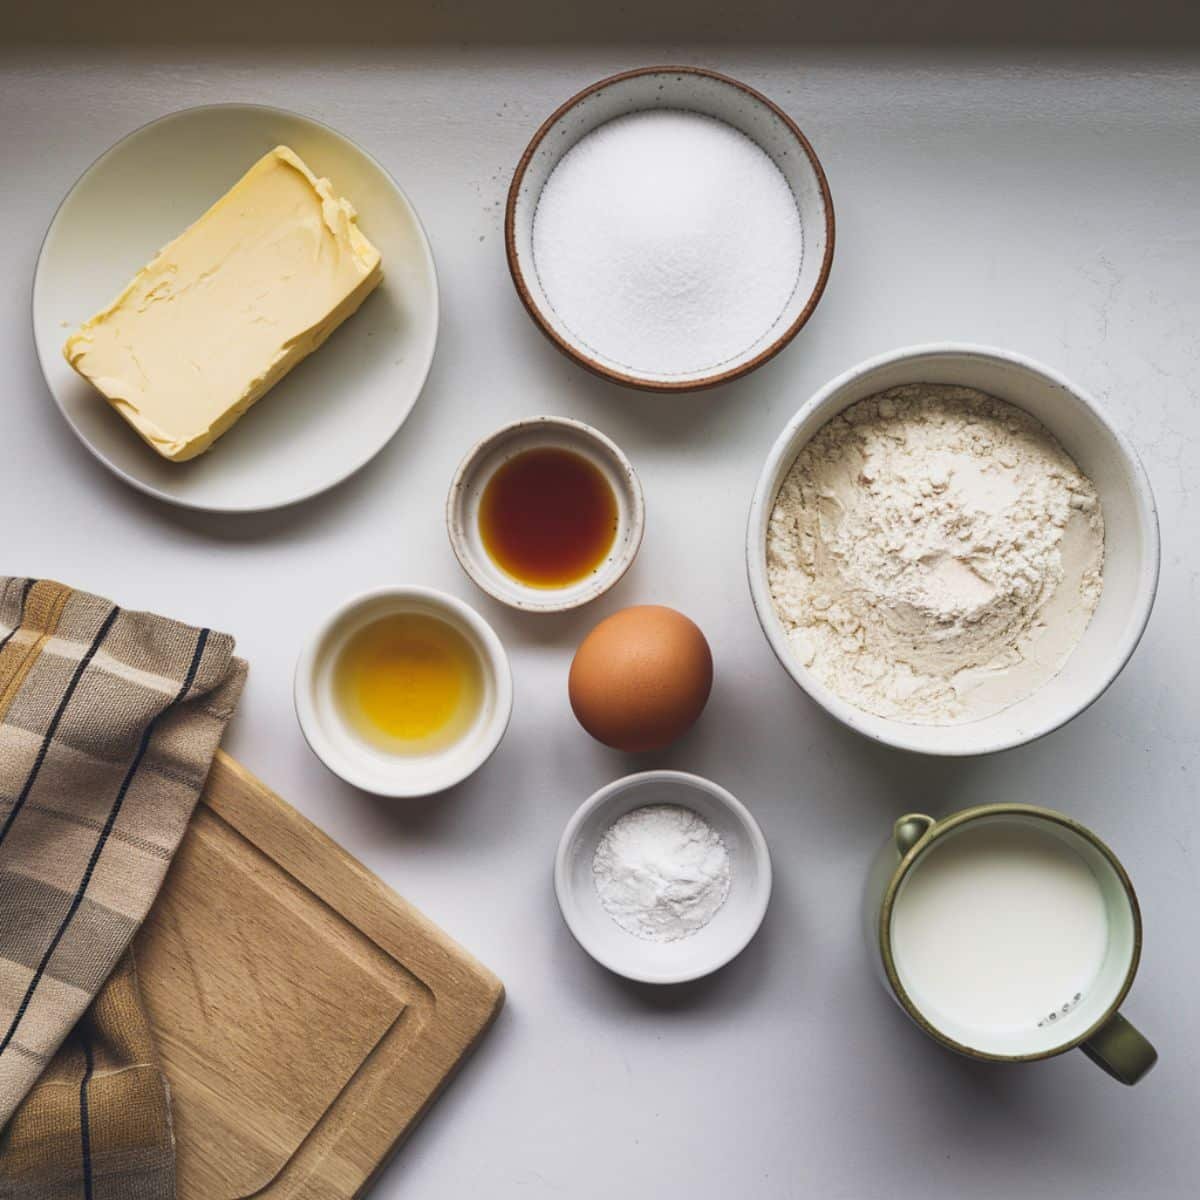
Here's everything you'll need to make vanilla wafer cookies:
- Unsalted butter
- Granulated sugar
- Egg
- Pure vanilla extract
- All-purpose flour
- Baking powder
- Salt
- Milk
See recipe card for quantities.
Substitution Options:
- For gluten-free vanilla wafers: Substitute the all-purpose flour with a 1:1 gluten-free baking flour blend
- For a dairy-free version: Use plant-based butter and non-dairy milk
- To reduce sugar: Replace up to half the granulated sugar with a natural sweetener like monk fruit
- For deeper flavor: Add almond extract alongside the vanilla
- For extra richness: Use vanilla bean paste instead of extract
Instructions
Prepare & Mix Ingredients
- Preheat your oven to 325°F and line baking sheets with parchment paper.
- Beat the softened butter and sugar together until light and fluffy, then add the egg and vanilla extract until well combined.
- In a separate bowl, whisk together the flour, baking powder, and salt, then gradually add to the wet ingredients along with the milk until a soft dough forms.
Shape the Cookies
- Using a small cookie scoop or two spoons, drop small rounds of dough onto the prepared baking sheets, leaving about 2 inches between each cookie.
- Gently flatten each cookie to about ¼ inch thickness using the bottom of a glass dipped in sugar.
- Make sure all cookies are uniform in size to ensure even baking.
Bake & Cool
- Bake for 13-15 minutes, or until the edges are lightly golden while centers might still look slightly soft.
- Let the cookies cool on the baking sheet for 5 minutes before transferring to a wire rack.
- Allow to cool completely for at least 1 hour to achieve that signature crisp vanilla wafer texture throughout.
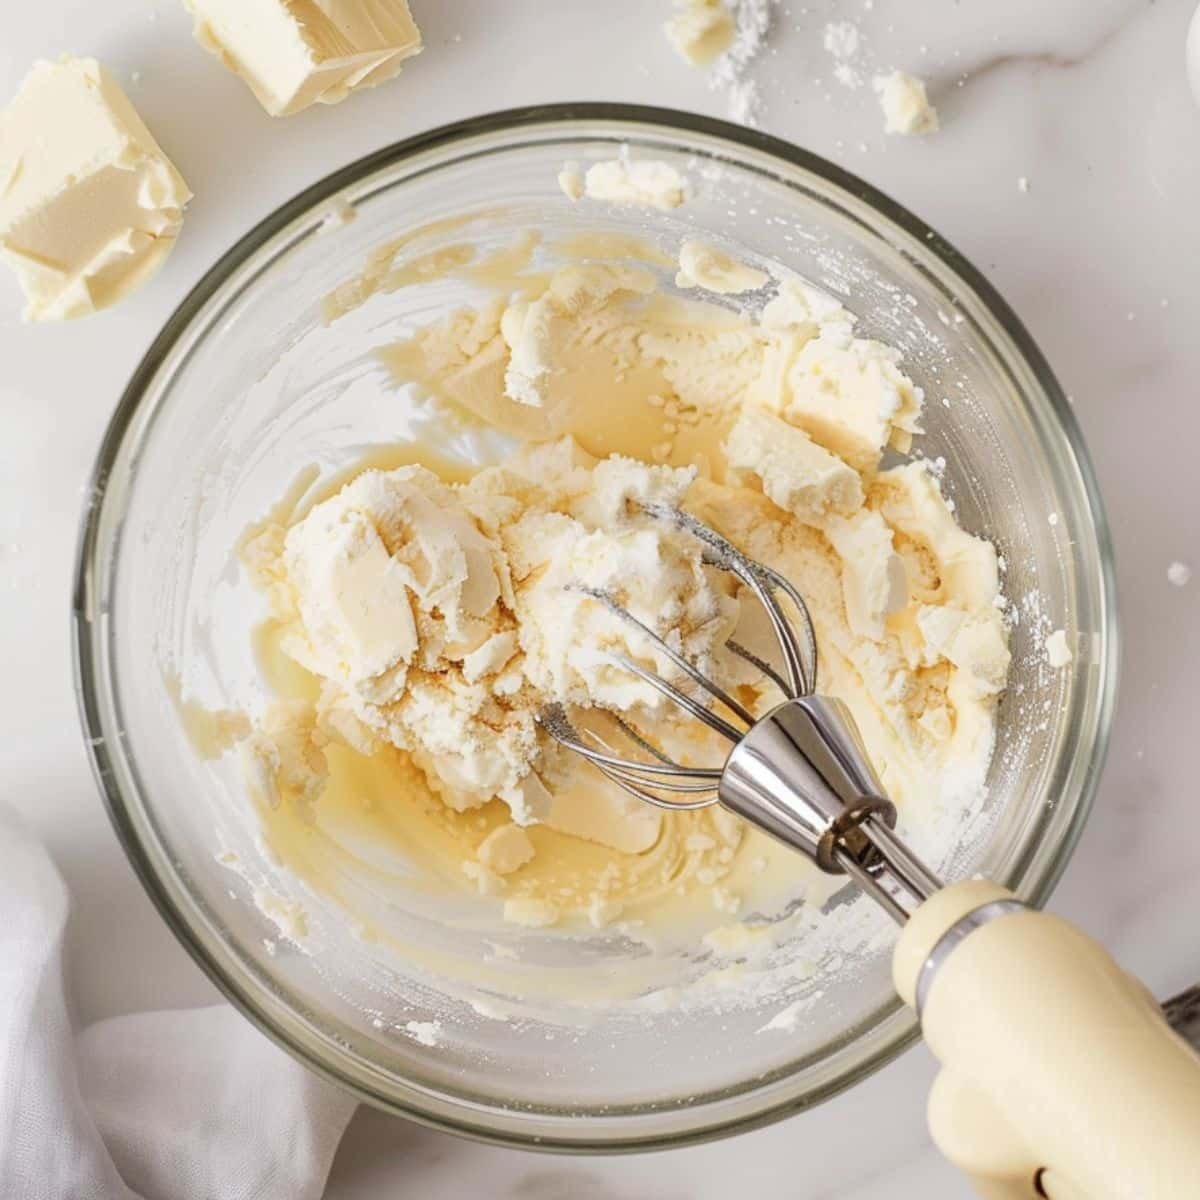
- Prepare & Mix Ingredients : Cream butter and sugar, then mix in egg and vanilla.
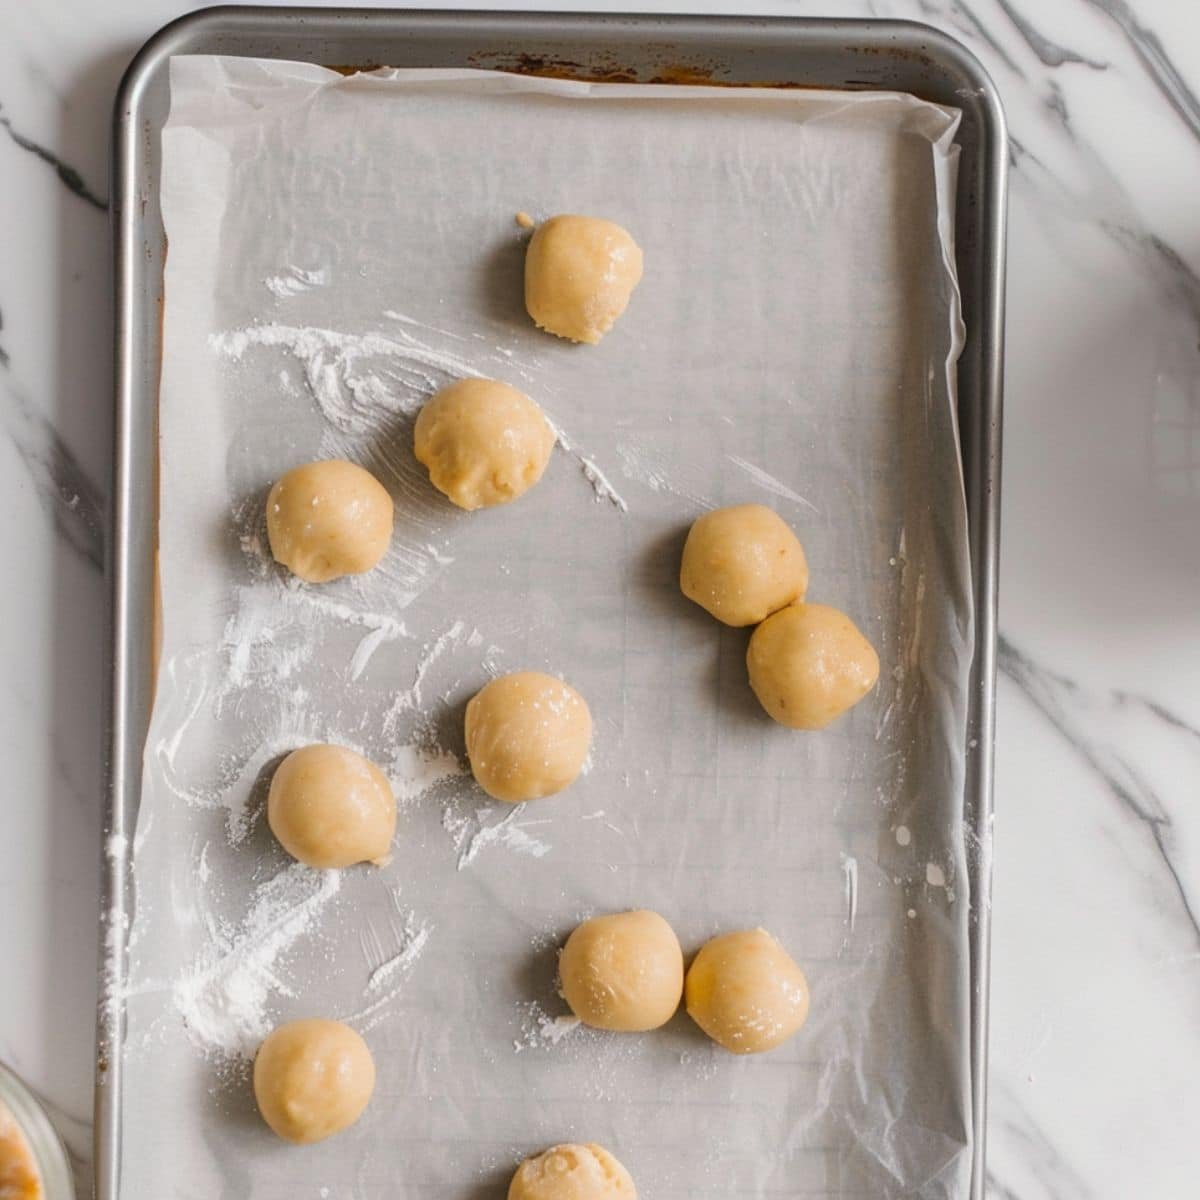
- Shape the Cookies : Scoop and gently flatten cookie dough onto tray.

- Bake & Cool : Bake until golden and cool completely on rack.
Equipment
For perfect vanilla wafer cookies, you'll need:
- Stand mixer or hand mixer: Creates the perfect creamy texture (a wooden spoon works too, but requires more effort)
- Small cookie scoop (1 teaspoon size): Ensures uniform cookies that bake evenly
- Baking sheets: Light-colored aluminum sheets prevent over-browning
- Parchment paper or silicone baking mats: Prevents sticking and makes cleanup easier
- Cooling rack: Essential for achieving that signature crispness as cookies cool
- Measuring cups and spoons: Accuracy matters for consistent results
Budget option: If you don't have a cookie scoop, two teaspoons work well - use one to scoop and the other to scrape the dough onto the baking sheet.
Hints & Expert Cooking Tips
- For the true vanilla wafer experience, make your cookies small - about 1.5 inches in diameter when baked.
- The creaming process is crucial - beat the butter and sugar until truly light and fluffy for the best texture.
- Use a cookie scoop for consistent sizing which ensures even baking.
- These cookies will crisp up as they cool, so don't worry if they seem slightly soft in the center when you take them out of the oven.
- For extra flavor, scrape the seeds from a vanilla bean into your batter alongside the extract.
- If your dough feels too sticky, chill it for 15-20 minutes before scooping.
- Rotate your baking sheets halfway through baking to ensure even browning.
Recipe Variations
Classic Variations:
- Lemon Vanilla Wafers: Add 1 teaspoon of fresh lemon zest to the batter for a bright citrus twist
- Spiced Vanilla Wafers: Add ¼ teaspoon each of cinnamon and nutmeg for a warm, spiced version
- Chocolate-Dipped: Once cooled, dip half of each cookie in melted chocolate for an elegant treat
- Brown Butter Vanilla Wafers: Brown the butter before creaming with sugar for a nutty, caramelized flavor
Dietary Adjustments:
- Keto Vanilla Wafer Recipe: Replace the all-purpose flour with almond flour and use a keto-friendly sweetener in place of sugar
- Vegan Vanilla Wafers: Use plant-based butter, a flax egg (1 tablespoon ground flaxseed mixed with 3 tablespoon water), and non-dairy milk
- Whole Wheat Option: Substitute half the all-purpose flour with whole wheat pastry flour for added nutrition
- Reduced-Sugar Version: Cut sugar to ⅔ cup and add ¼ teaspoon of stevia powder
Want to try another classic cookie? Check out our Homemade Graham Crackers Recipe that pairs perfectly with these vanilla wafers for amazing dessert crusts.
Storage
Counter Storage
Store completely cooled vanilla wafer cookies in an airtight container at room temperature for up to 2 weeks. For maximum crispness, place a small piece of paper towel in the container to absorb any moisture.
Freezing Instructions
These cookies freeze beautifully! Place completely cooled cookies in a freezer-safe container with parchment paper between layers to prevent sticking. They'll keep for up to 3 months.
To thaw: Simply let them come to room temperature on a plate for about 30 minutes.
Make-Ahead Dough
You can prepare the dough and refrigerate it for up to 3 days before baking. Let it sit at room temperature for about 15 minutes before scooping and baking.
Using in Desserts
For banana pudding or other layered desserts, bake the cookies a day or two in advance so they can fully crisp up before using.
My Grandmother’s Secret Touch
When I was little, I’d sit on the kitchen counter watching my grandmother bake her famous Vanilla Wafer Cookies, always wondering what made them taste so special. Years later, I discovered her quiet secret—a whisper of nutmeg, just ⅛ teaspoon, stirred gently into the batter. She never measured it, just a knowing pinch from her fingertips. That tiny dash added a comforting warmth and depth that lingered long after the last bite. And she always insisted on patience—cooling the cookies on a wire rack for at least an hour, letting them crisp to golden perfection. It’s these little touches, passed down with love, that make Vanilla Wafer Cookies not just delicious, but unforgettable.
FAQ
Are Nilla Wafers the same as vanilla wafers?
Nilla Wafers are a specific brand of vanilla wafers made by Nabisco. While all Nilla Wafers are vanilla wafers, not all vanilla wafers are Nilla Wafers. The difference lies in the recipe and ingredients. Homemade vanilla wafer cookies typically have a more pronounced vanilla flavor and fresher taste compared to store-bought Nilla Wafers. Many recipes, including banana pudding, traditionally call for Nilla Wafers but any vanilla wafer cookie will work as a substitute.
Are vanilla wafers being discontinued?
No, vanilla wafers are not being discontinued. While specific brands or varieties might occasionally change their product lineup, vanilla wafers remain a popular cookie available in most grocery stores. Nabisco's Nilla Wafers, the most recognized brand, continues to be produced and widely distributed. Some consumers noticed package size reductions or recipe adjustments over the years, which may have sparked discontinuation rumors. For guaranteed access to vanilla wafers, you can always make homemade versions using simple ingredients.
What is the first ingredient in vanilla wafers?
The first ingredient in most commercial vanilla wafers, including Nilla Wafers, is enriched flour (wheat flour with added nutrients). In homemade vanilla wafer cookies recipes, the first ingredient is typically unsalted butter, which creates the cookie's tender, rich texture. This difference highlights why homemade versions often taste better. When making vanilla wafers from scratch, starting with room temperature butter ensures proper creaming with sugar, resulting in that classic light, crisp texture that makes vanilla wafers perfect for snacking or using in desserts.
Bring the Magic Home with Every Bite
These homemade Vanilla Wafer Cookies are more than just a treat—they’re a nostalgic nod to the classics, reimagined with fresher ingredients and a more vibrant vanilla flavor. Whether you’re layering them in banana pudding, crushing them into a buttery pie crust, or enjoying them straight from the cooling rack, these cookies deliver a satisfying crunch and warmth in every bite.
With just a handful of pantry staples and a simple, foolproof method, Vanilla Wafer Cookies are the perfect weekend baking project. They’re versatile, family-friendly, and so delicious, you might never reach for the boxed kind again.
Tried this recipe? We’d love to hear how you used your batch! Did they make it into a special dessert—or vanish before they even cooled? Drop your thoughts in the comments and don’t forget to rate the recipe if you loved it!
And if you’re in the mood for more homemade cookie goodness, don’t miss our Soft & Chewy Lemon Blueberry Cookies for a zesty twist, or try the Oatmeal Raisin Cookies Recipe – Perfectly Soft & Delicious for a cozy, classic bite.
Happy baking—and here’s to cookies that taste like home
Related
Looking for other recipes like this? Try these:
Pairing
These are my favorite dishes to serve with Vanilla Wafer Cookies Recipe

Easy Vanilla Wafer Cookies
Equipment
- 1 Stand mixer or hand mixer For creaming butter and sugar until fluffy
- 1 Small cookie scoop 1 teaspoon size; ensures uniform cookies
- 2 Baking sheets Light-colored to prevent over-browning
- 1 Parchment paper or baking mats Prevents sticking
- 1 Cooling rack Helps cookies crisp up evenly after baking
- Set Measuring cups and spoons For accurate measurements
Ingredients
- ½ cup Unsalted butter Softened
- ¾ cup Granulated sugar
- 1 Egg Large
- 1 tablespoon Vanilla extract Pure
- 1 cup All-purpose flour
- ½ teaspoon Baking powder
- ¼ teaspoon Salt
- 2 tablespoon Milk
- ⅛ teaspoon Nutmeg Optional for added warmth
Instructions
- Preheat oven to 325°F, line baking sheets
- Cream butter and sugar; add egg and vanilla
- Whisk dry ingredients; mix into wet with milk
- Scoop dough and flatten slightly
- Bake 13–15 mins until edges are lightly golden
- Cool on sheet, then wire rack for 1 hour

Leave a Reply