
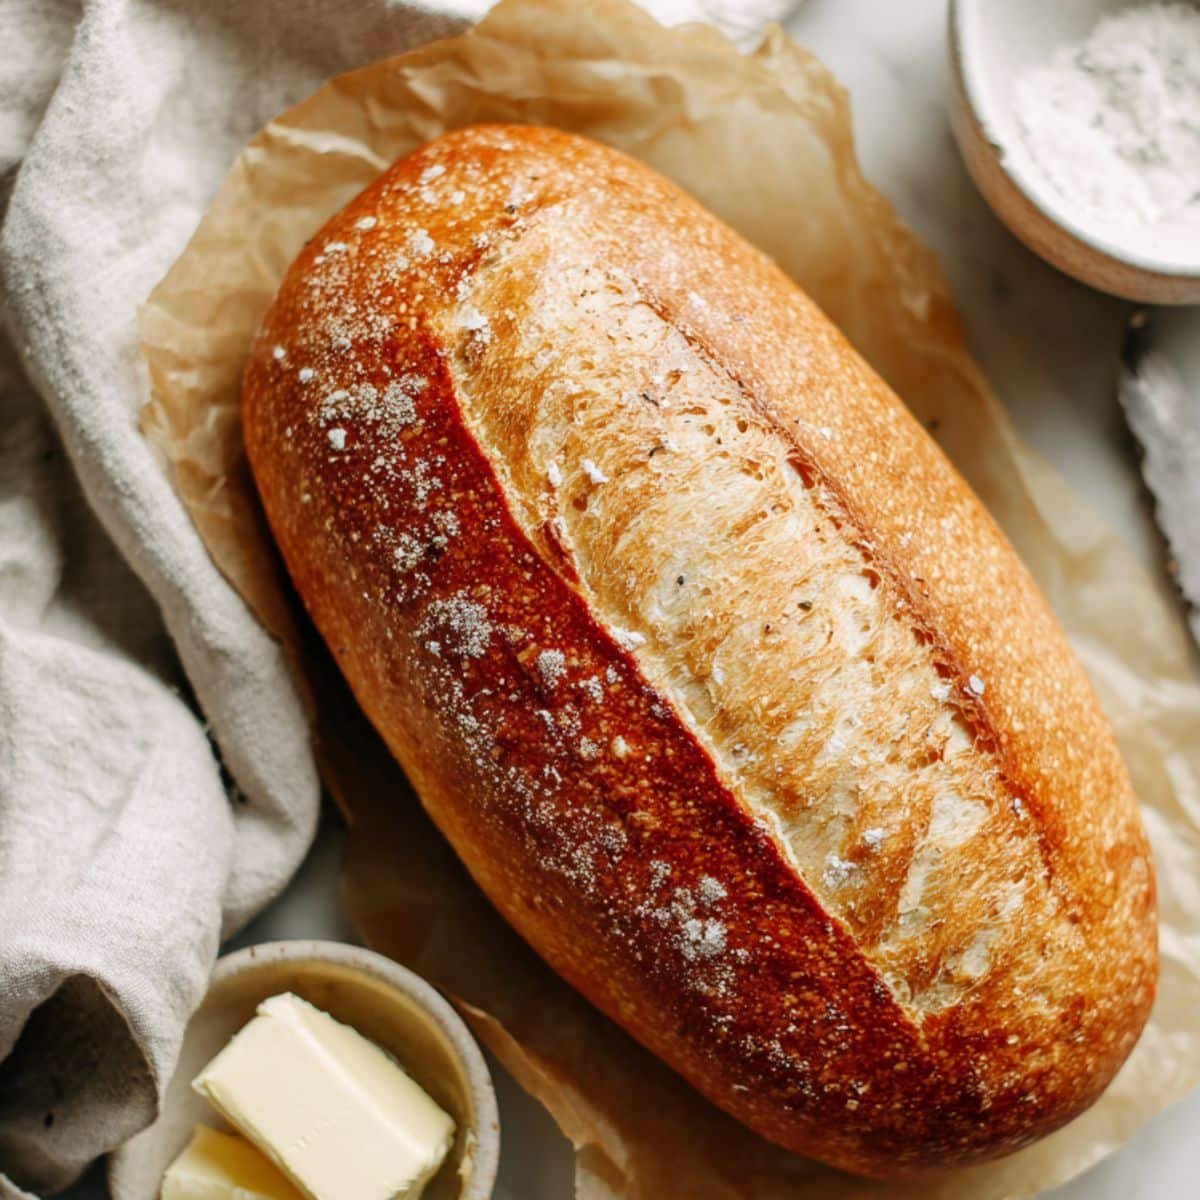
Ever wondered how to recreate the magic of a rustic Italian bakery right in your own kitchen? This Italian bread recipe makes it possible—no passport required. With just a few simple ingredients and minimal effort, it delivers an irresistible golden crust and a light, airy interior that’s perfect for any occasion. Whether you're crafting a hearty sandwich, preparing a dinner side, or enjoying a warm slice with butter, this loaf brings classic Italian comfort to every bite.
What truly sets this recipe apart is its authenticity. Inspired by traditional methods passed down through generations, it captures the essence of real Italian baking—no complex techniques or fancy tools needed. Even if you’re new to bread-making, you’ll find it approachable and rewarding. This recipe is ideal for busy home bakers who crave that fresh-from-the-oven aroma without spending hours in the kitchen. In short, it’s more than just a recipe—it’s a gateway to mastering the art of rustic, homemade Italian bread.
Why This Italian Bread Recipe Stands Out?
Italian bread recipe holds a cherished place in Mediterranean cuisine. From rustic bruschetta to savory paninis, it’s the heart of countless traditional dishes. This Italian bread recipe brings that same time-honored flavor and texture into your home kitchen—no shortcuts, no compromises. Unlike store-bought loaves packed with preservatives and additives, it relies on just a few pure ingredients: flour, water, yeast, salt, and a touch of olive oil. It's a return to the authentic techniques passed down through generations of Italian bakers.
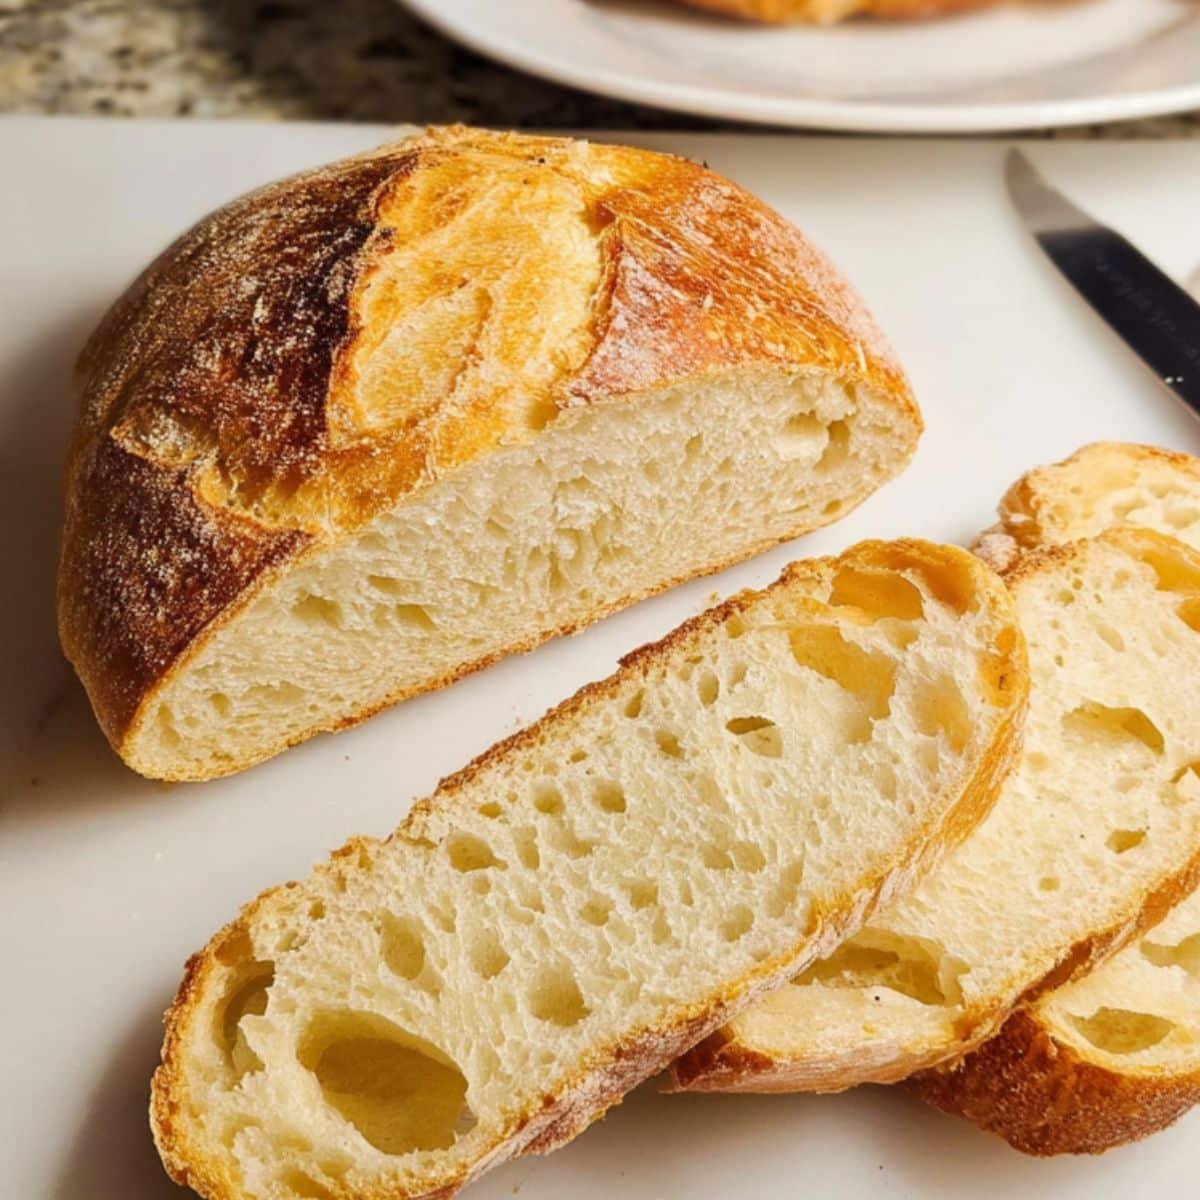
What makes this crusty bread truly special is its incredible versatility and artisan quality. Whether paired with bold soups like minestrone, toasted for garlic bread, or layered into a gourmet sandwich, it always delivers. The result is a rustic loaf with a crisp golden crust and a tender, airy interior—complete with those coveted, irregular holes. If you're looking to master traditional Mediterranean baking, this is the Italian bread recipe that belongs in your recipe book.
Jump to:
Ingredients
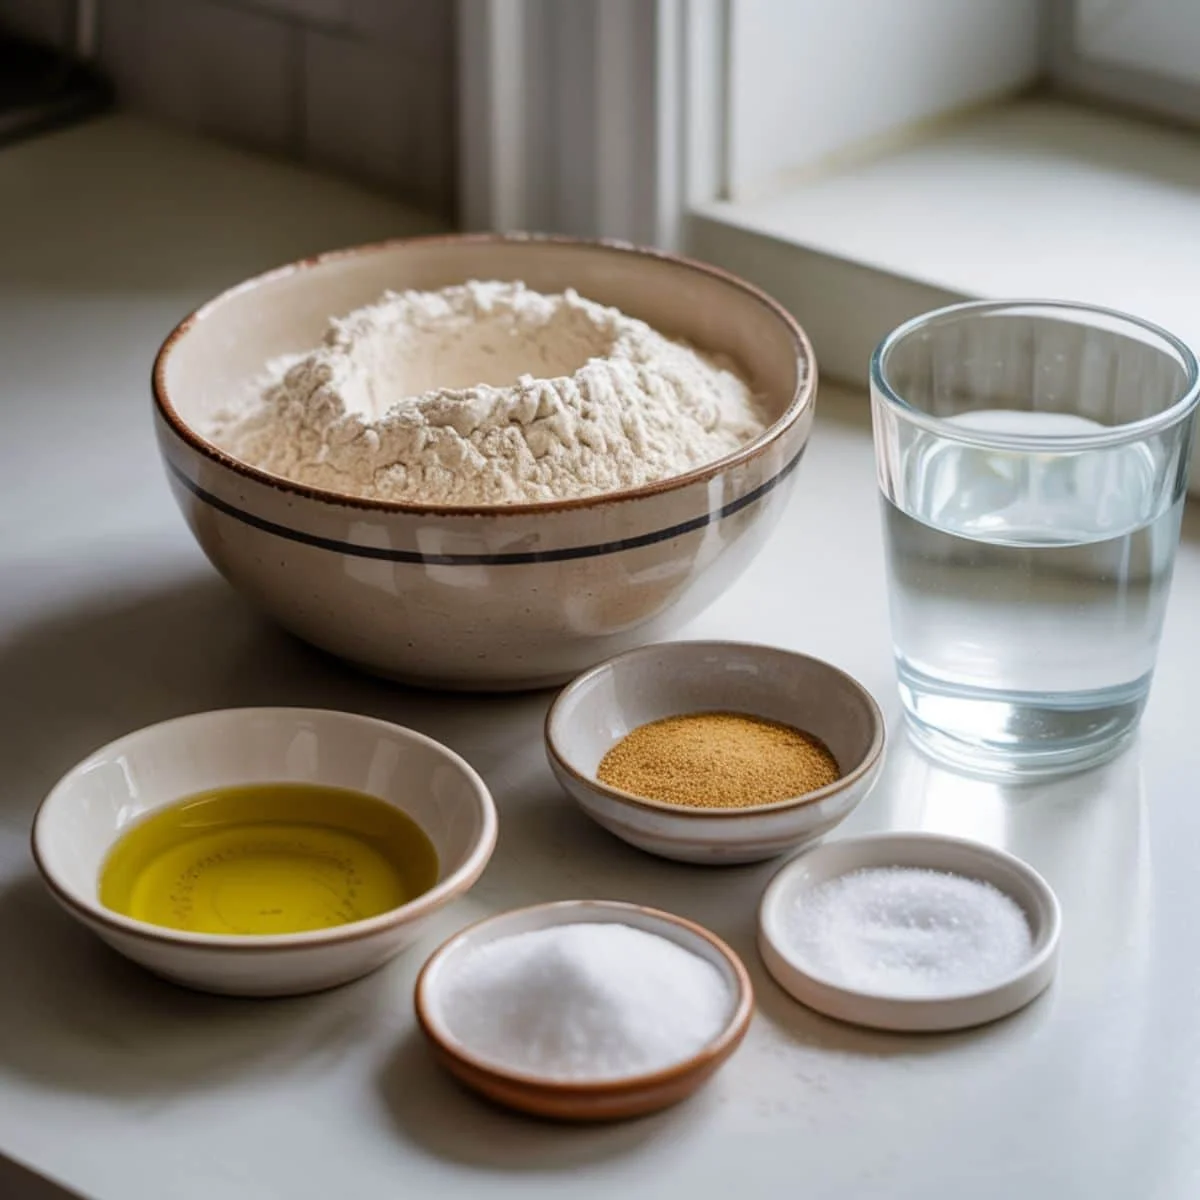
Essential Ingredients:
- Bread flour
- Warm water
- Active dry yeast
- Salt
- Olive oil
- Sugar
See recipe card for quantities.
Instructions
Prepare and Mix the Dough
- Combine warm water and sugar in a large mixing bowl
- Sprinkle active dry yeast over the surface and let sit for 5-10 minutes until foamy
- Add olive oil to the activated yeast mixture
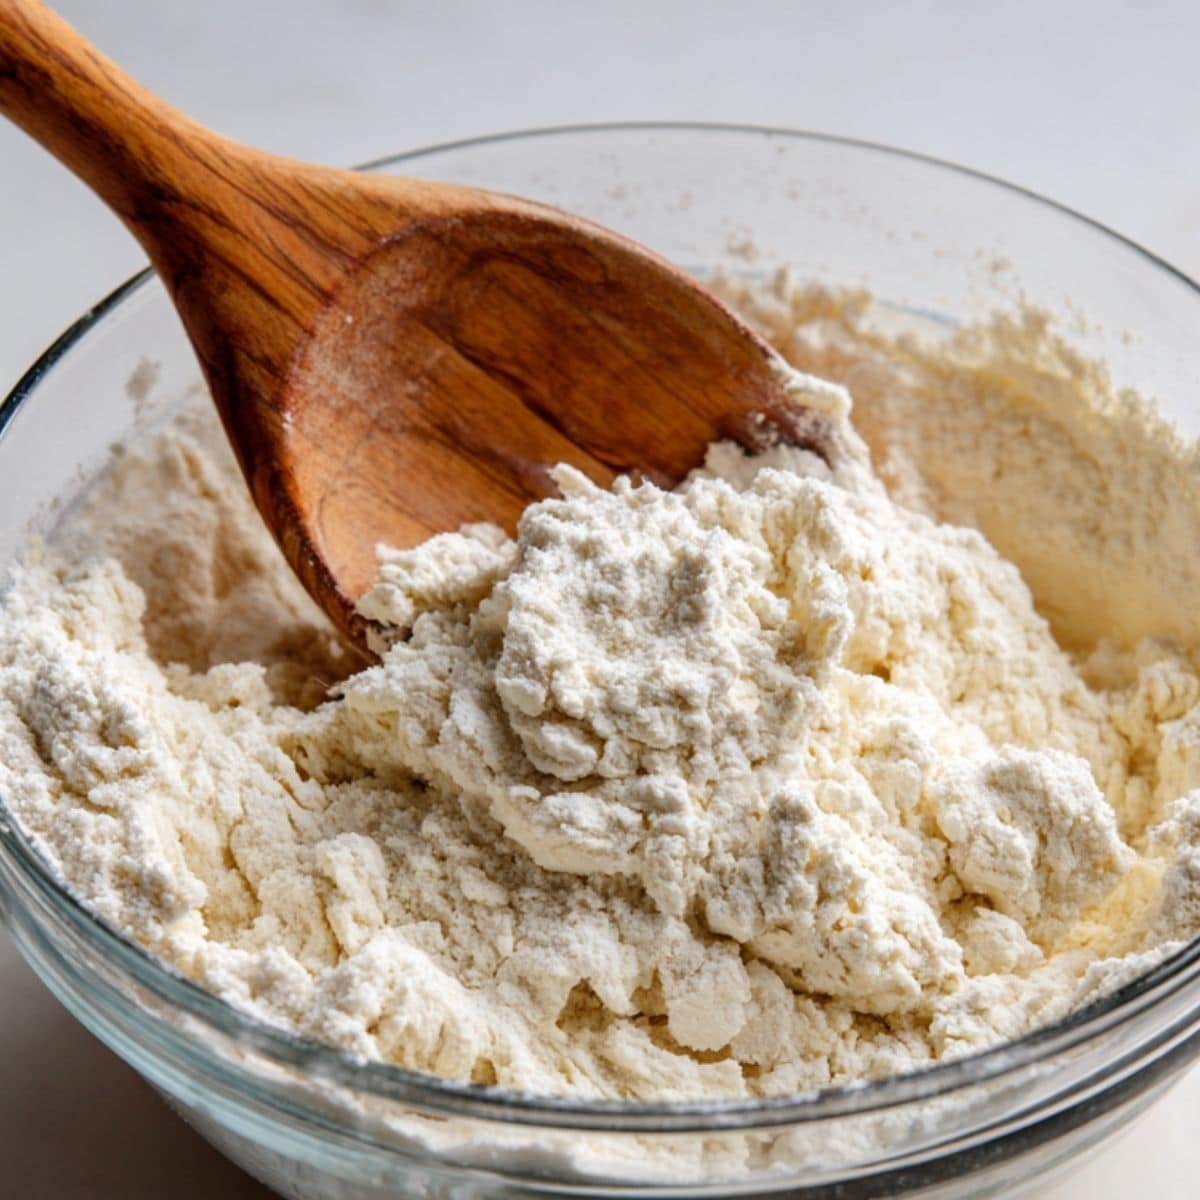
- Gradually incorporate flour and salt, mixing until dough comes together
- Turn dough onto floured surface and knead for 8-10 minutes until smooth and elastic
First Rise and Shaping
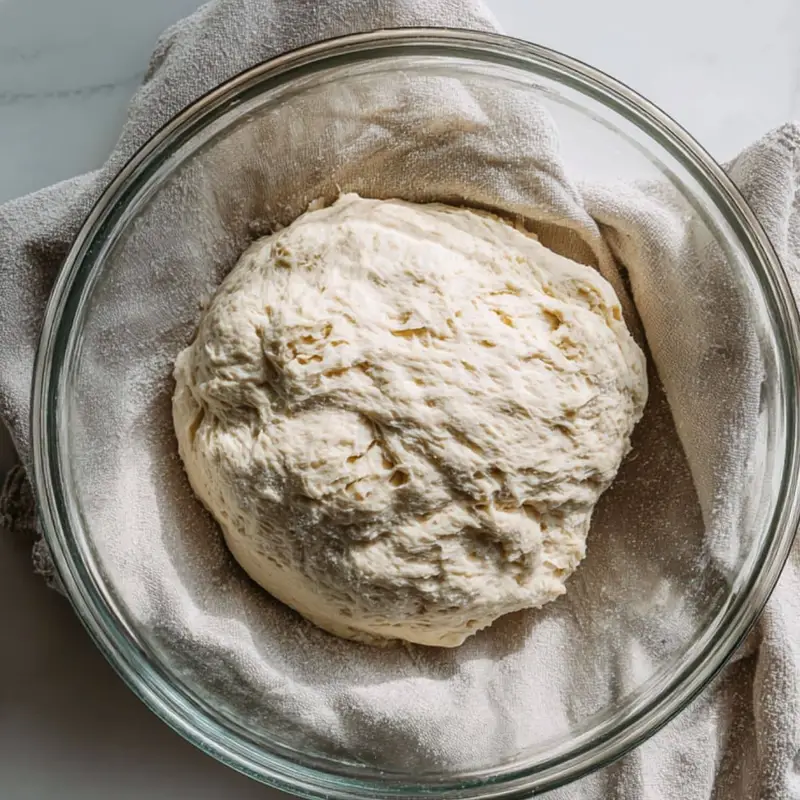
- Place kneaded dough in an oiled bowl, turning to coat all sides
- Cover with damp towel and let rise in warm place for 1-1.5 hours until doubled
- Punch down dough and shape into an oval loaf on parchment-lined baking sheet
- Cover and let rise again for 30-45 minutes until puffy
- Preheat oven to 425°F and score the top with 3-4 slashes
Baking to Perfection
- Place a shallow pan of water on bottom oven rack to create steam
- Bake for 30-35 minutes until golden brown and internal temperature reaches 190°F
- Bread should sound hollow when tapped on the bottom
- Cool for at least 30 minutes before slicing
- Prepare and Mix the Dough: Mix warm water, sugar, yeast, and flour, knead until smooth
- First Rise and Shaping: Let the dough rise until doubled, then shape into a loaf
- Baking to Perfection: Bake at 425°F with steam until golden brown and hollow-sounding
Equipment For Italian Bread Recipe
Must-Have Tools:
- Large mixing bowl for proper dough rising
- Kitchen scale for accurate measurements
- Bench scraper for handling sticky dough
- Baking stone or sheet for even heat distribution
- Instant-read thermometer for checking doneness
- Sharp knife or razor blade for scoring
Budget-Friendly Alternatives:
- Inverted baking sheet instead of baking stone
- Clean kitchen towel instead of proofing basket
- Sharp kitchen knife instead of bread lame
Expert Tips for the Best Italian Bread
- Steam is crucial for achieving the perfect crusty crust - always use a water pan
- Don't rush the rise - longer fermentation develops better flavor
- Use a thermometer to ensure water isn't too hot for yeast
- Test yeast freshness - it should foam during proofing
- Avoid over-flouring as it creates dense, heavy bread
- Let bread cool for 30 minutes before slicing to prevent gummy texture
- Use the windowpane test to check proper gluten development
Recipe Variations
Popular Variations:
- Italian Garlic Bread: Brush with garlic-infused olive oil before second rise
- Focaccia Style: Press into baking pan, dimple surface, add olive oil and herbs
- Herb-Crusted: Mix dried oregano, basil, and thyme into flour
- Semolina Version: Replace half the bread flour with semolina flour
Dietary Modifications:
- Vegan: Recipe is naturally vegan with plant-based ingredients
- Whole Wheat: Replace up to half bread flour with whole wheat flour
- Gluten-Free: Use 1:1 gluten-free flour blend (texture will vary)
- No-Knead: Mix ingredients and ferment slowly in refrigerator 12-24 hours
Storage
Storage Methods:
- Room Temperature: Wrap in clean kitchen towel for up to 3 days
- Freezing: Wrap in plastic wrap, then foil - freeze up to 3 months
- Refreshing: Sprinkle stale bread with water, warm in 350°F oven for 5-7 minutes
Meal Prep Options:
- Make dough ahead and refrigerate after first rise for up to 24 hours
- Freeze shaped loaves before baking - thaw and bake when needed
- Slice and freeze individual portions for quick toasting
The Forgotten Step That Changed My Italian Bread Forever
Years ago, while apprenticing under a seasoned baker in a quiet village just outside Naples, I stumbled upon a secret that would forever change how I approached every Italian bread recipe. One misty morning, as the aroma of rising dough filled the air, he leaned over and whispered, “If you want your bread to truly come alive, let the flour drink first.” I was puzzled at first—until he introduced me to the autolyse method: a humble step where you mix only flour and water, then let it rest for 30 minutes before adding anything else.
That short pause unlocked a world of difference. The flour fully absorbed the water, developing gluten naturally and enhancing flavor in ways I never imagined. From that moment on, every Italian bread recipe I made had deeper complexity, a chewier crumb, and a beautifully rustic crust. It’s a small change with a big impact—and the true secret behind an unforgettable loaf of crusty, homemade Italian bread.
FAQ
What makes Italian bread different?
Italian bread differs from other breads by using olive oil, which creates a softer texture and richer flavor. This homemade Italian bread recipe produces a golden, crusty exterior with a tender, airy interior. Unlike French bread, Italian bread contains olive oil and salt, resulting in a more flavorful and slightly denser crumb structure.
What type of flour do Italians use for bread?
Italians traditionally use "00" flour (doppio zero) for bread making, which is finely milled and has moderate protein content. This Italian bread recipe works perfectly with bread flour or all-purpose flour. Many Italian bakers also incorporate semolina flour for added texture and authentic flavor in their rustic Italian bread.
What ingredients are in Italian bread?
Traditional Italian bread contains just six simple ingredients: bread flour, warm water, active dry yeast, salt, olive oil, and sugar. This classic Italian bread recipe creates authentic bakery-style bread at home. The olive oil distinguishes it from French bread, while the minimal ingredients showcase the quality of each component.
What is Italy's traditional type of bread?
Italy's most traditional bread is "pane pugliese" - a rustic country loaf with a thick, crusty crust and open crumb. This Italian bread recipe captures that authentic style. Other traditional varieties include ciabatta, focaccia, and regional specialties. Each Italian region has unique bread traditions, but all share the characteristic crusty exterior and soft interior.
From Your Oven to the Table: Mastering the Art of Italian Bread
This Italian bread recipe is proof that you don’t need a professional kitchen—or a passport to Italy—to enjoy the magic of fresh, homemade bread. With a handful of pantry staples and a little time, you’ll craft a rustic loaf with that signature golden crust and soft, airy crumb that’s perfect for everything from hearty soups to toasted sandwiches.
Ready to make your kitchen smell like a traditional Italian bakery? Roll up your sleeves and try this Italian bread recipe today! And when you do, don’t forget to rate the recipe and leave a comment—your feedback helps fellow bakers rise to the occasion. If you loved this, check out some of our other top-rated bakes like the comforting Easy Amish Cinnamon Bread Recipe or the low-carb favorite, Ultimate Keto Zucchini Bread Recipe.
Happy baking—and as they say in Italy, buon appetito!
From my kitchen, with heart.
Emily Nelson ❤️
Related
Looking for other recipes like this? Try these:


Pairing
These are my favorite dishes to serve with Italian Bread Recipe


Italian Bread Recipe
Equipment
- 1 Large mixing bowl For combining and proofing dough
- 1 Bench scraper Helpful for handling and dividing dough
- 1 Baking sheet or stone For even baking
- 1 Instant-Read Thermometer Ensures proper doneness
- 1 Sharp knife or lame For scoring the loaf
- 1 Kitchen scale Optional but ideal for accuracy
Ingredients
- 4 cups Bread flour Preferably unbleached
- 1.5 cups Warm water Around 110°F
- 2.25 teaspoon Active dry yeast One standard packet
- 1.5 teaspoon Salt Fine sea salt or kosher salt
- 2 tablespoon Olive oil Extra virgin for best flavor
- 1 tablespoon Sugar Helps activate yeast
Instructions
- Mix warm water and sugar, sprinkle yeast and let it sit until foamy
- Stir in olive oil, then add flour and salt; mix to form dough
- Knead on floured surface for 8–10 minutes until elastic
- Place in oiled bowl, cover and let rise until doubled (1–1.5 hours)
- Punch down, shape loaf, and let rise again (30–45 minutes)
- Score top, bake at 425°F for 30–35 minutes with water pan for steam
- Cool on rack for at least 30 minutes before slicing


Leave a Reply