
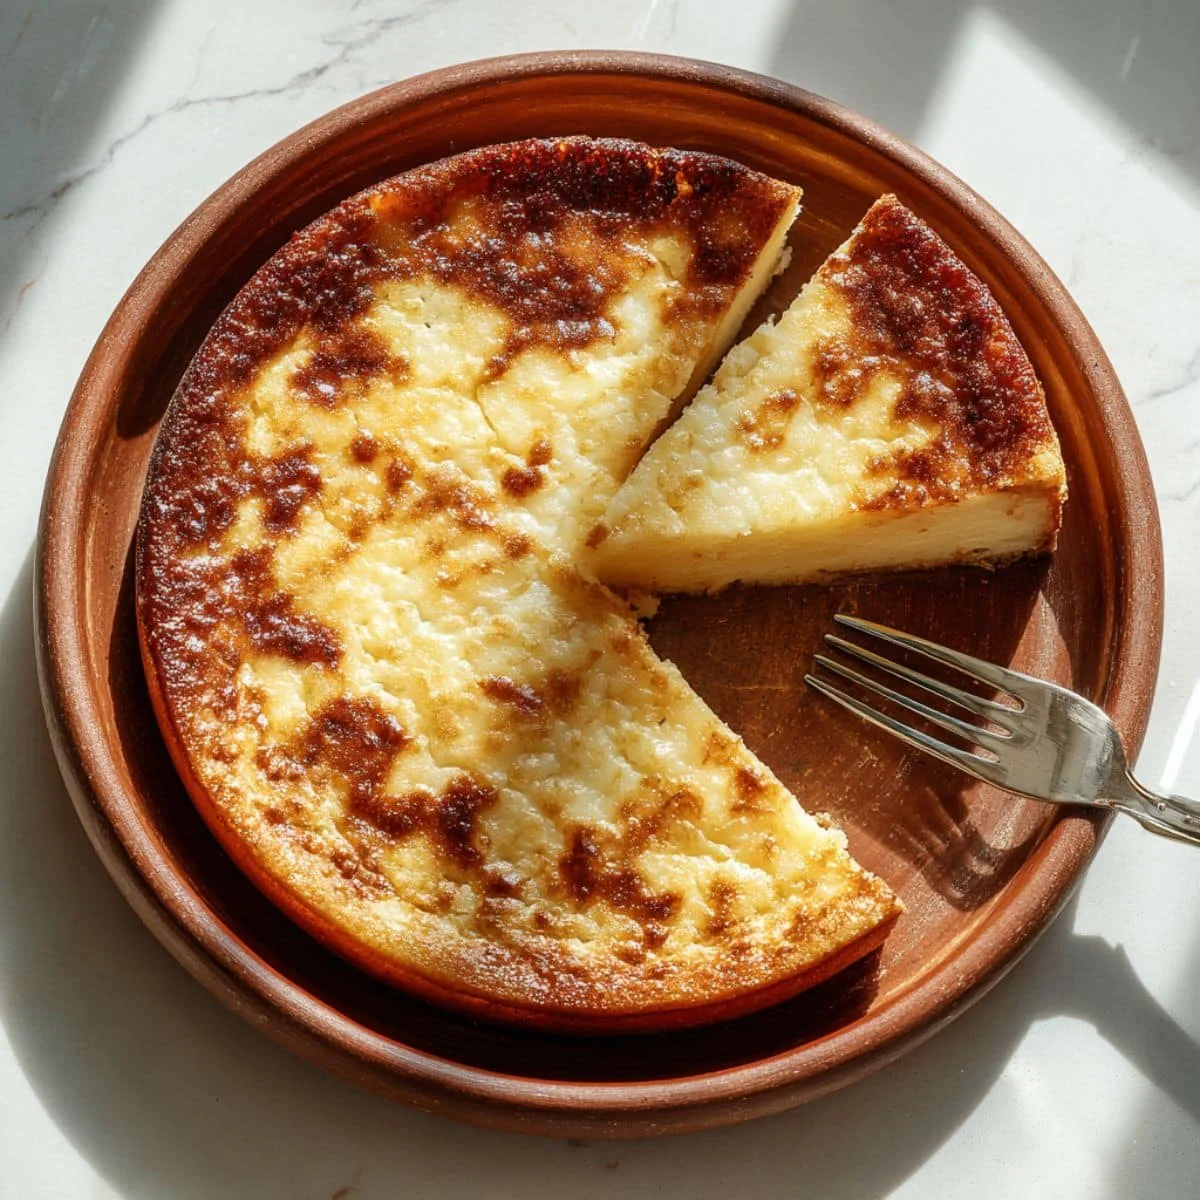
Welcome to the wonderful world of Filipino desserts! As someone who's spent countless hours perfecting traditional recipes, I'm thrilled to share this incredibly simple yet satisfying 3 ingredient cassava cake that has become a staple in my kitchen. This beloved Filipino dessert proves that sometimes the most magical creations come from the simplest ingredients, and this cake is no exception.
What makes this 3 ingredient cassava cake so special is its ability to deliver rich, creamy texture and authentic Filipino flavors without the complexity of traditional recipes. Whether you're a beginner baker or an experienced cook looking for a quick treat, this recipe will become your go-to dessert for any occasion.
Background & Why This 3 Ingredient Cassava Cake Recipe Stands Out?
The beauty of this cassava cake lies in its simplicity and authentic taste that connects us to Filipino culinary traditions. Unlike complicated dessert recipes that require numerous ingredients and lengthy preparation times, this recipe delivers the same beloved flavors and textures that have made cassava cake a cherished Filipino merienda for generations. The recipe respects the traditional essence while making it accessible to modern home cooks.
This particular cassava cake recipe stands out because it maintains the moist, chewy texture and sweet coconut flavor that defines excellent recipe. By focusing on just three essential ingredients, we eliminate the guesswork and potential for error while ensuring that each component plays a crucial role in creating the perfect dessert. The result is a foolproof cassava cake that delivers consistent, delicious results every single time.
Jump to:
Ingredients
- Fresh grated cassava or frozen grated cassava
- Sweetened condensed milk
- Coconut milk
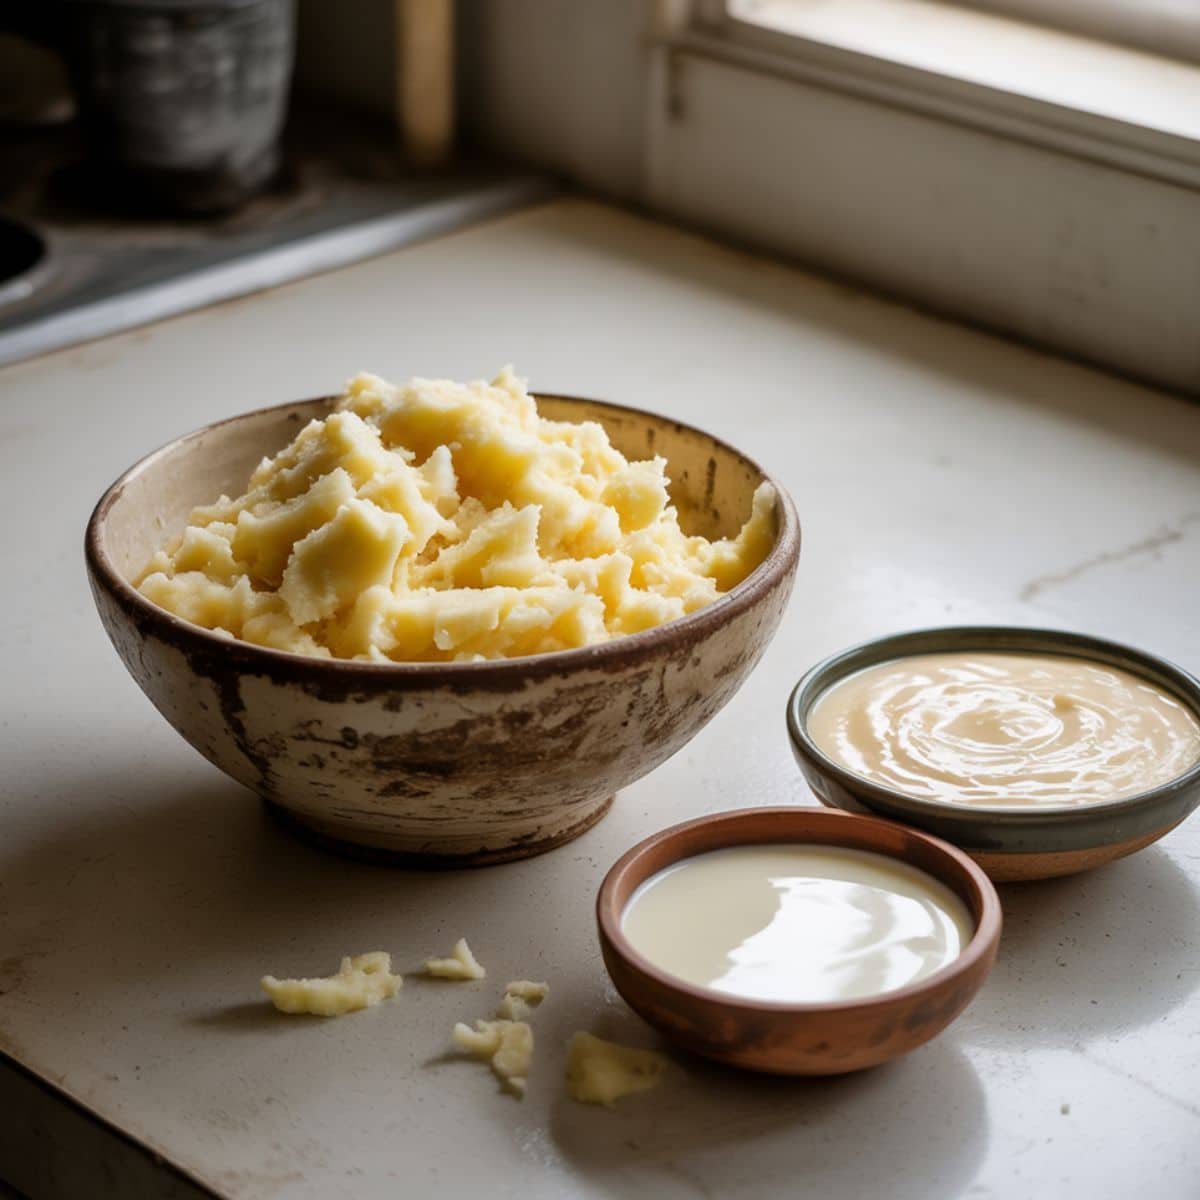
See recipe card for quantities.
Instructions
Prepare Your Base
- Preheat your oven to 350°F (175°C)
- Grease your baking dish with butter or cooking spray
- If using fresh cassava, peel and grate finely; if using frozen, thaw completely and drain excess liquid
Mix the Ingredients
- In a large mixing bowl, combine the grated cassava with sweetened condensed milk
- Gradually add coconut milk while stirring continuously
- Mix until all ingredients are well incorporated and the mixture has a smooth, pourable consistency
Bake to Perfection
- Pour the mixture into your prepared baking dish
- Bake for 45-60 minutes until the top is golden brown and a toothpick inserted in the center comes out clean
- Allow to cool for 15 minutes before serving
Equipment For Cassava Cake
- Large mixing bowl
- Whisk or wooden spoon
- 9x13 inch baking dish
- Measuring cups
- Grater (if using fresh cassava)
- Oven
Expert Cooking Tips
- Always drain excess liquid from thawed frozen cassava to prevent a watery 3 ingredient cassava cake
- Test doneness by inserting a toothpick in the center; it should come out with just a few moist crumbs
- Let the cake cool completely before cutting for cleaner slices
- For extra richness, use full-fat coconut milk
- Grease your baking dish generously to prevent sticking
Recipe Variations
- Add a layer of cheese on top for a sweet and savory 3 ingredient cassava cake twist
- Mix in some ube extract for a colorful purple version
- Create individual servings using muffin tins
- Add macapuno (coconut strings) for extra texture
- Try steaming instead of baking for a softer, more traditional texture
Storage
- Store leftover 3 ingredient cassava cake covered in the refrigerator for up to 5 days
- Wrap individual portions in plastic wrap for easy grab-and-go snacks
- Freeze portions for up to 3 months in airtight containers
- Reheat gently in the microwave for 30-45 seconds before serving
- Keep at room temperature for no more than 2 hours to maintain food safety
Secret to the Ultimate Cassava Cake
The secret to achieving the perfect 3 ingredient cassava cake lies in understanding the moisture balance and cooking temperature. Many home cooks struggle with either too-dry or too-soggy results, but the key is using the right ratio of wet to dry ingredients and baking at a consistent moderate temperature. This allows the cassava to cook through evenly while developing that characteristic golden-brown top that signals perfection.
Another crucial secret is the resting period after baking. While it's tempting to dive right in, allowing your cake to cool and set properly ensures the best texture and makes slicing much easier. The flavors also meld together beautifully during this cooling time, creating the authentic taste that makes this dessert so beloved in Filipino cuisine.
FAQ
What are the ingredients in cassava cake?
The traditional cassava cake requires only grated cassava (fresh or frozen), sweetened condensed milk, and coconut milk. These three simple ingredients combine to create the authentic Filipino dessert that's beloved for its creamy texture and sweet coconut flavor. This minimal ingredient list makes the cassava cake perfect for beginners.
How to make an easy 3 ingredient cake?
Making an easy 3 ingredient cassava cake involves mixing grated cassava with sweetened condensed milk and coconut milk, then baking at 350°F for 45-60 minutes. The simplicity of this recipe makes it ideal for quick desserts. Simply combine all ingredients, pour into a greased baking dish, and bake until golden brown.
How healthy is cassava cake?
Including the 3 ingredient cassava cake version, provides carbohydrates and some nutrients from cassava root, which contains vitamin C and fiber. However, this recipe is a dessert with condensed milk and should be enjoyed in moderation. The cassava itself is naturally gluten-free, making this cassava cake suitable for those avoiding gluten.
What are the ingredients in Panlasang Pinoy cassava cake?
While Panlasang Pinoy's version may include additional ingredients like eggs and cheese, our simplified cassava cake focuses on the essential components: grated cassava, sweetened condensed milk, and coconut milk. This streamlined approach to cassava cake maintains authentic Filipino flavors while making the recipe more accessible to home cooks with minimal ingredients.
Perfect Your Filipino Dessert Game
This cassava cake recipe proves that incredible desserts don't require complicated ingredient lists or advanced baking skills. The beauty of this 3 ingredient cassava cake lies in its simplicity and the authentic Filipino flavors it delivers with minimal effort. Whether you're preparing this for family gatherings, potluck events, or simply satisfying your sweet tooth, this recipe will become a treasured addition to your dessert repertoire.
As you master this recipe , consider expanding your easy dessert collection with our Easy Blue Velvet Cake Recipe and Easy Coffee Cake Muffins Recipe. These additional recipes complement the simple approach of our cassava cake while offering variety for different occasions and flavor preferences. Happy baking, and enjoy sharing this delightful taste of Filipino tradition with your loved ones!
From my kitchen, with heart.
Emily Nelson ❤️
Related
Looking for other recipes like this? Try these:


Pairing
These are my favorite dishes to serve with 3 ingredient cassava cake


Easy Cassava Cake
Equipment
- Large mixing bowl For combining ingredients
- Whisk or wooden spoon Mixing batter
- 9x13 inch baking dish Greased before pouring batter
- Grater If using fresh cassava
- Oven Preheated to 350°F (175°C)
- Measuring cups For condensed milk & coconut milk
Ingredients
- 2 lbs Fresh or frozen grated cassava Thaw and drain if frozen
- 1 can (14 oz) Sweetened condensed milk Adds sweetness & creaminess
- 1 can (13.5 oz) Coconut milk Full-fat recommended for richness
Instructions
- Preheat oven to 350°F (175°C) and grease a 9x13 inch baking dish.
- Grate fresh cassava or thaw and drain frozen cassava.
- In a large mixing bowl, combine cassava with sweetened condensed milk and mix well.
- Add coconut milk and stir until fully incorporated.
- Pour the batter into the prepared baking dish and spread evenly.
- Bake for 50 minutes or until top is golden brown and edges pull away slightly.
- Let it cool for at least 15 minutes before slicing and serving.


Leave a Reply